Boards < General < Player Guides < Timain's Extensive New Player Guide

Boards

« Prev | 1 2 3 | Next »

  • Timain
  • User
  • Posts: 723

Posted at 2014-07-29 11:30:05 — Link

Most of this is done for now. I'm still thinking of adding a few things here or there, but mostly I'm content with this guide as it is now. Please let me know what you think!

This is a (very long xD) guide to beginner's questions. Most of these answers can be found around the site, but I figured it would be useful to have the answers all in one place, so I put this together. If you feel anything is unclear, needs to be added or is too convoluted, please let me know by answering to this thread or sending me a message.

Table of Content:
How to get Money / How to get Vermillion / What to build first / Buildings Rundown
Feeding Pets and Pet Stats
Genetics / Colours and Patterns / Deviant Colours
Throdama and Morphs
Genetic Power / Heroes in X Generations
Catching Wild Pets
What are Kami? / Are there Special Looks that Pets can't get anymore?
Interesting Links


  • Timain
  • User
  • Posts: 723

Posted at 2014-07-29 11:30:40 — Link

How to get Money

To make money, you can check this guide: Guide: Making Money - Imitatia has put together a lot of good info in there, but the gist is: Do as many quests as you can (if you don't have the pets you need, you can try asking to lend one here: Quest Trades? {Temporary Trades for Quests}) and otherwise, explore, explore, explore. Materials and items mostly come from Exploration. You might get the feeling that it doesn't go very fast in the beginning, but while exploring, your pet gets experience and levels up. Once it hits level 11, the islands it visits get bigger. And a bigger island means more materials to find, more monsters to defeat for more experience and more treasure chests for a chance at the really good items. At level 21 the island gets bigger again, then again at 31 and 41. The last level islands are really quite big and the piles of silver you pick up on those are also worth quite a bit more, so by then you can get a very good amount of money / materials from exploring. The other thing is, the treasure chests I mentioned can hold items that are only sold in the Premium Store. My recommendation, sell those! Rainbow Jars, Mutagens, (Squad) Energy Potions, Change Sex scrolls etc. sell very well and for quite a nice sum of money on the player trades. 

How to get Vermillion

A resource you will never have enough of if you start seriously breeding your pets: Vermillion. I have seen this question asked a lot lately, so I am going to cover this one too. 

If you just started playing and don't even really know what this is: You need 100s and 1 Vermillion to research one gene of your pets. So to fully research one pet, you need to find out 20 genes, therefore 2000s and 20 Vermillion. 

First of, the only real way to get this resource is by exploring islands. You can't buy it from the Premium or the State Store, so this only leaves other players or exploration. Since this is fairly rare and almost everyone needs what they find themselves, if you find any on the trades, it's going to be expensive. Now, you can make it a bit easier on yourself though by paying attention to these two points:

1, Build the Astrologist. In my What To Build First guide, this isn't very high up on the list. I'm ranking other buildings much higher priority, but once you're getting desperate for more of this wonderful red resource, you might want to start thinking about the Astrologer. Once you have the building, you just input the name of the item you want to look for, and your Astrologers will help you find things. This is not a guarantee that you find anything, but it makes the chances higher. 

2. Use pets with Agile Paws for exploration and only explore Grassland
Grassland islands have special monsters, the Forest Monster Guardians. This is what they look like:
Apparently those buggers didn't like the constant explorers coming and taking their treasures, so they started protecting their treasure chests with Vermillion seals. This horribly backfired though, since a pet that's lucky (or agile) enough can break the seal open, get what's inside the chest AND get some Vermillion from the seal to boot! A normal pet will have a 50% chance to open the seal successfully and get the extra Vermillion, but a pet with Agile Paws has an awesome 70% chance
 
So whenever you see a monster that looks like the one above, you can start hoping that the chest that it's guarding will yield some extra Vermillion. You will get a notification that looks something like this if your pet successfully broke the seal: "You found Vermillion from magic seal (x)" (Thanks to Azure for letting me know the exact wording :D) 
 

What To Build First / A Buildings Rundown

This is a topic where everyone has their own opinions. In the end there is no wrong way to do it, but there are a few buildings you won't need for a while.

Before I go into this list though, here is one important tidbit: Do NOT buy blueprints from the State Store! They are terribly overpriced there! You can either find them while exploring yourself if you're lucky, or otherwise you can buy them in the Player Trades. This is usually a much better option! There are also often giveaways with blueprints for new players in the Contests and Giveaways section of the forums.

Probably the most important buildings to upgrade first would be the Warehouse and the Stable.

After this, important buildings are:
- the Embassy (gives you 7 instead of 5 quests each day -> more money)
Townhall (increases your daily income)
- the Inn (You can invite certain helpful people and get 50s per day. See this Guide: Inn Guests for a rundown of the Inn)

Once you have all this, you can consider building these:
Sanctuary (lets you replenish one pet's energy once per day - it is a free Energy Potion each day, but its usefulness is arguable, since it's only one pet per day) 
Cartographer's Guild (this is VERY important if you want to capture wild pets, as it will let you see where the pets are on the map. If you don't want to catch your own pets, don't bother with this one as it's very expensive to build)
State Portal Service Branch (this building lets you exchange 5 pets a day for 5 Energy Flow Cards each (so 25 cards a day); one Energy Flow Card correlates to one additional island for you to explore. NOTE: You will lose the pet you send to the portal service! There is no way to get them back, so think carefully before you use this!)
Astrologist (you can choose an item and your Astrologers will help you find these while you explore. Note: This only makes your chances at finding things higher, it is still not guaranteed that you will get anything!)
Ridinghall (lets you train pets and pets don't need to have any Energy to start training, however, while they train they will not be able to do anything for the duration of 4 hours and will not regain Energy. Also, the first level only lets you train pets up to level 10, so you need to upgrade the building to get to higher levels. But then, the training gets expensive. As an example, to train a level 46 pet to 47 costs a whopping 3680 silver!)
Reserve (you can send pets you don't want to care for anymore but that you don't want to give away to the Reserve. They will not count to your stable size anymore and not eat food, but for that you won't be able to do anything with them anymore)
Military Academy (this building is necessary to create Squads so you can go to the Battlefield. My personal recommendation would be to first build up the rest of your buildings and get this once you have some good pets with better tactics. Otherwise, you won't get anywhere on the Battlefield anyway :))

Back to Top


  • Timain
  • User
  • Posts: 723

Posted at 2014-07-29 11:33:24 — Link

Feeding Pets and Pet Stats
 
So for the often asked question first: You can't feed pets directly! Each server reset (0:00 AM Beastkeeper time), each pet will eat 18 units of food. This food is taken right out of your Warehouse, no need to do anything about that. If you don't have enough food on hand, it's also no big deal, the game will take 1s per missing food right from your silver balance. So if you don't have any food at all at server reset, each pet will cost you 18 silver. On a sidenote, this only happens if you log in. So, if you want to go on vacation or can't make it online, nothing will happen. Your pets will just not eat on that day, so neither food nor silver will be taken away from you.
 
Now, the next question I have heard a lot is how you can raise a pet's stats (Intelligence, Strength, Agility, etc.). This happens with food
 
- Raising stats with normal feeding and leveling
 
If you leave all settings as they are, whenever your pet levels up, the game gives it 6 points which will be randomly attributed to all the 6 stats. So you could end up getting 1 point for each stat or 3 to Strength, 1 to Intelligence, 2 to Agility and 0 to all the others, etc. In this case the chance for each stat to receive the additional point is the same. 
 
You can however, change your pet's diet. To do this, go to your pet's profile and click on the stars in the Diet Composition box on the left side. If you increase the stars for Animal Fats, your pet will consume more of those each day, but for that when the pet levels, the chance that Strength (the corresponding stat to Animal Fat) gets boosted is much higher. 
 
To see which food corresponds to which stat, hover over the question mark in the Diet Composition box. It's actually easy though. The top food is for the top stat (Animal Fat -> Strength). The second food corresponds with the second stat (Plant Proteins -> Agility) and so on.
 
In order to raise stars in one food group, you first have to decrease the stars for a different food. You do this by clicking on the first (left-most) star. This will reduce the amount of (yellow) stars to 1. You can also set one stat to 0 stars by clicking on that first star a second time. Next you choose which stat you want to increase and click on the fifth (right-most) star in that line. This will fill the bar and "light up" all 5 stars. Before you can save your changes with the little button at the bottom, you need to make sure that all points are attributed to a food. 
 
Note though, this does not guarantee that the stat you want will be boosted! The game still randomly gives out stats when your pet levels, but now the chance that your stat will get aditional points is much higher.
 
"But Timain, which stats do I want to boost? What do they even do???"
This is a difficult topic really, not easily answered..
The one stat that you will most often want to be high is Strength, because that directly affects how many times a pet can breed! Otherwise, all the stats have an effect on how well your pet fights in the arena. All of them are about equally important though. If you hover over the question mark next to Characteristics, you will see this:
As you can see, no stat is more important than the others here, always two stats work together for one battle trait, like Defence is affected by your pet's Strength and Constitution or Dodge depends on Agility and Intuition.
 
The advantage to this two-stat-per-trait system is that we can safely ignore one of them, as long as we raise the linked stat - here's an example:
If I have a pet with 50 Strength and 50 Constitution (50+50=100), it has the same Defence as if I had 80 Strength and only 20 Constitution (80+20=100 aswell), because Strength and Constitution are equally important for it. 
However Constitution is also linked to Anti-Critical-Hit, so if you forego that, you will need to boost the other Anti-Crit-stat (Intelligence) in order to have decent anti-crit.
 
If you don't want to focus on any specific battle trait but still have high Strength for more breeding points, you can focus food points on Strength, Intelligence and Intuition. Those three still cover everything, because Strength affects Defence and Damage; with Intelligence you get Accuracy plus Anti-Crit and with Intuition you are covered on Dodge and Crit Chance. 
 
Of course, you can play around with this. If, for example your pet has Counterstrike, you could increase the Dodge chance even more by boosting Agility AND Intuition. In order to do this, you will have to decrease some other stats and thus sacrifice some other battle-trait, but for that you will increase the likelihood for Counterstrikes! Like this, you can basically tailor each pet's stats to its special gene set if you want to.
 
To make this whole thing a bit more complicated, there is one more thing to consider:
 
If you want to get the most out of the stat points you get, you should boost the stats that are affected by a positive gene (=stats in green on non-GP pets), because each extra stat point will give you an additional 25 or 50% depending which gene affects the stat. Let's say you have a pet with Quickmind (= 50% to Intelligence). Every time you get a point assigned to Intelligence, you also get the extra 50% from Quickmind, so in essence you get 1,5 points instead of just 1!  
 
There are people who try and boost red stats to make up for the negative gene - I would highly recommend to NOT do that! Instead red genes should always be ignored as much as possible (Strength might be an exception here, since without it, your pet will not be able to have too many children)
 
To illustrate my point, I will give you two examples:

Say you have a lvl 1 pet with 30 base Intelligence and Quickmind (=50% additional Int). Even at this point it already shows 45 Intelligence (30 base + 50% = 45). Now if you managed to get only one point for every level on this pet, at level 50, the base Int would be 80 (30 + 50 levels*) - and again you would get the 50% bonus from Quickmind, resulting in 120 Int! (80 + 50% = 120). Now if you set the corresponding food for Int to 5 stars, you might actually get quite a few more points per level than 1! 

Take the opposite example: A pet with Silly has an inherent -50% on Intelligence. Let's assume our level 1 has the same base 30 Int. Because of Silly it will only show up as 15 Int! (30-50%=15) Now let's assume you don't change stats and your pet gets 1 stat point for each level, ending with 80 Intelligence again (like in the last example) - because of Silly the pet actually only has 40!!! Intelligence now (again 80 - 50% = 40). 

* Actually it would be 30+49, since you are lvl 1 already and only get 49 levels until you reach 50.. But it's so much easier to calculate with 50 that I left it at that ;-)
 
See the massive difference here? You will never be able to make up for a "stat-eater" gene.. Even a gene that only reduces a stat by 25% will take quite a bit.. To stick with our above pet example, if our lvl 50 pet had Slow-Minded, which reduces Int by 25%, the 80 Int would show as 60 (80 - 25% = 60). Nowhere near as bad as 40, but you still lost 20 points that you could have in another stat instead!
 
So to recap:
  1. You can choose to raise the chance certain stats will be boosted through leveling by changing the corresponding food.
  2. Strength affects how many breedings a pet has.
  3. Always two stats affect the battle-traits Dodge, Crit-Chance and Anti-Crit-Chance, Defence, Attack and Accuracy.
  4. If you have green stats (from a positive gene), it is a good idea to boost that stat, while red stats should generally be avoided.
  5. If you have all black stats and want to raise Strength, you can put 5 stars to Strength, Intuition and Intelligence.
- Raising stats with Magic Food
 
Another way of raising your pet's stats is with so-called Magic Food. You may have come across them, they are
  • Bamboo Berries (Strength)
  • Cactus Melon (Constitution)
  • Dragon Maple (Agility)
  • Glowshroom (Intuition)
  • Heart Fruit (Courage)
  • Nutpea (Intelligence)

You can either buy these in the Premium Shop, find them while exploring or buy them via the Item Trades from other players. To use them, you need to go to your Inventory, click the food you wish to use (they are in the "Other" category), select Use and in the next screen select the pet you wish to use it on and hit the Feed button. Your active pet will be automatically selected, but you can still change this with the dropdown menu to any other pet.

For one unit of these Magic Foods, you can get (randomly) between 1 and 3 points, up to a maximum of 50 additional points. Note: The closer you get to this maximum of 50 extra stat points, the more likely it is that you only get 1 point per food unit, so getting the maximum may turn out to be quite expensive!

Back to Top


  • Timain
  • User
  • Posts: 723

Posted at 2014-07-29 11:34:14 — Link

Genetics

The genetics in this game work on the basis of Mendel's laws. Here's a rundown:

You know how the genes on your pets are separated in lines, and each line has 2 genes. Like the first line is the 2 genes for Jaws, next line for the 2 Senses genes, next is the line with the Brain genes and so on. Always, the gene on the left side is from the mother and the gene on the right from the father. When a breeding occurs, the game randomly picks one of those two genes to pass to the child.

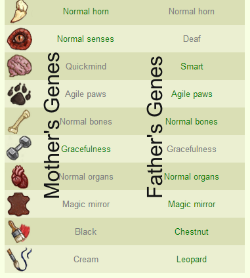
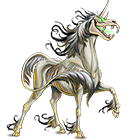
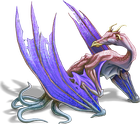
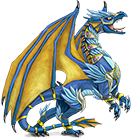
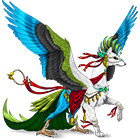
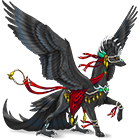
I will do an example which will hopefully make it clearer.. Let's take my pet Sure Fire (those are his genes in the picture up there) and look at his Brain genes (third line). To decide which genes he would have, the game looked at the mother's genes (Sure Fire's mother is True Legacy) and randomly selected one of her genes. She has Determined and Quickmind:

Both had an equal chance to be passed down to Sure Fire. So in this case, the game chose Quickmind and put it on the left (the mother's) side of Sure Fire's Brain genes.

Then the game looked at the father's genes and again randomly selected one of those two. In this case, Dune has Smart and Quickmind

The game chose Smart and put this on the right (the father's) side of Sure Fire's Brain genes.

So now Sure Fire has Quickmind on the left and Smart on the right side of his Brain genes: 


To see what the possibilities are for a baby's outcome, you can do a Mendel's table, which means you put one parent's genes to the top, one parent's genes to the left and combine like this: 

    Mother's Gene 1 Mother's Gene 2
    Determined Quickmind
Father's Gene 1 Smart Determined / Smart Quickmind / Smart
Father's Gene 2 Quickmind Determined / Quickmind

Quickmind / Quickmind

See how Sure Fire is in this case the top right outcome (Quickmind / Smart) but there would have been three other possibilities as well?

Anyway, once the game has affixed the genes to the new pet, it will check the power of each gene to see which will be dominant (green) and which recessive (grey). You can see the power of each gene by hovering over it in a pet's Genetics tab or by checking in this list. In our case, Quickmind has a power of 50, while Smart has a power of 90. Since 90 is higher than 50, Smart is the dominant gene and Quickmind only recessive. What does that mean? Dominant means it is the "expressed" gene, the one that will be shown to the world , the one that actually does something for your pet's stats. Recessive genes are hidden. They don't do anything to the pet except that they can be passed down to offspring. In our example, Sure Fire has Smart and Quickmind. Smart increases the pet's Intelligence by 25%, Quickmind would increase it by 50%. Since Smart is dominant, Sure Fire's Intelligence is only increased by 25% (if you hover over his Intelligence, it says his basic value is 94, his genetics increase the stat by 24, which equals 25%). 

Colours and Patterns

Colours and Patterns work the same way as the other genes. 

In general you can say that the less power a colour has the harder it is to breed for (if you look at Unicorns again, Gray has the least power with only 40, so as soon as any other colour gene gets passed to the baby, Gray will only be recessive and not be shown). An easier chart to see this is the List of Skins. This is organized by Power already, so the colours/patterns at the top and to the left are the strong ones and the ones on the right / bottom are weaker and therefore the hardest to breed for. So again looking at Unicorns, the Silver Gray (made by having a Unicorn with Gray colour and Cream pattern gene) would be the rarest of the colours, while the White Uni the least rare (which is true, you will find the Pound cluttered with White Unicorns).

I will try my hand at another example. Because it's much easier, I will only do an example by colour. Pattern works the exact same way.

Let's say we want a Buckskin Unicorn. If we check the  List of Skins we can see that this colouring is quite far to the bottom, meaning that a lot of other colours are more powerful - to be able to see thee colour though, we need the gene to be dominant (more powerful than the other gene, remember? :)).  If our Uni had White, Bay, Chestnut or Black in its genes, we would see those and Buckskin would be hidden as recessive gene. Only Gray is less powerful than Buckskin.

So let's say you have a Uni in your Stable that has Chestnut / Gray in its genes. You would look through available studs and find one that has Buckskin double (hooray!).

Now when you breed those two, remember that it is completely random WHICH gene each parent gives to the baby. These are the chances for offspring:

    Mother's Gene 1 Mother's Gene 2
    Chestnut Gray
Father's Gene 1 Buckskin Chestnut / Buckskin Buckskin / Gray
Father's Gene 2 Buckskin Chestnut / Buckskin Buckskin / Gray

As you can see, you might end up with a baby with Chestnut and Buckskin (in which case Chestnut would overpower Buckskin) or with a baby with Buckskin and Gray - and since Buckskin is more powerful than Gray, you would end up with a Buckskin Unicorn! Huzzah!

To spin this a bit further, let's say you ended up with a Chestnut / Buckskin baby. You could wait for it to grow up and then breed it to another Uni with double Buckskin gene. The possible outcome would look like this:

    Mother's Gene 1 Mother's Gene 2
    Chestnut Buckskin
Father's Gene 1 Buckskin Chestnut / Buckskin Buckskin / Buckskin
Father's Gene 2 Buckskin Chestnut / Buckskin

Buckskin / Buckskin


So the possible outcomes are now Chestnut / Buckskin (in which case again, you wouldn't see the Buckskin colour) and Buckskin / Buckskin. To the naked eye, this looks the exact same as before, out of four babies 2 could look Chestnut and 2  Buckskin. However, now you actually have a chance to get a double Buckskin gene, which ties me to the following chapter - Deviants.
 
Deviant Colours

If you know how to breed for a specific colour, it's not too hard to breed for Deviants. First we have to know what Deviant Colours actually are. You could say, a Deviant is a mutation that occured when you bred your pets. Whenever you breed and the baby gets two of the same colour or pattern genes, there is a 10% chance for the baby to "mutate", to get the Deviant variant of the colour or pattern.
IMPORTANT NOTE: Deviant colours are NOT inheritable!
 
So first of all, you need to know the genes of the parents. If you can, select parents that both have the same colours or patterns to maximize the chance that the baby will get 2 of the same colour / pattern. Let's do another example, shall we?
 
Let's say I want to breed for a Gray Variant. I look through my stables for a female that has two Gray genes. This is actually the easiest variant to do, since we already know that Gray is the least powerful of all the colour genes.No matter which other colour might be in the genetic mix, the other colour would ALWAYS be stronger than Gray and overpower it.  This means that if I see a pet with a gray colour, there can't possibly be another colour hidden as recessive. So, for my purposes, I select Spot Me Some Blue. I then look some more for a male and find my Romulus in my stables. I breed them together. Now I have a 10% chance that the baby will have the mutation, so I might have to rebreed the two of them a few times before I get what I want. And what do you know? The baby that came from this breeding is Lilac Fantasy. When the baby is born it will look like any other gray baby,

you don't see which variant it will be, but you can tell by the little asterisk (*) next to the Colour that this is in fact a deviant. 
 
If you want to breed for a Pattern variant you will do this the same way. You select parents who preferably already have a double pattern gene, so it's guaranteed that the baby will get double pattern as well. It's then still a 10% chance that you get a baby with the mutation but if the parents only have one of the genes to begin with you lessen those chances even more! Someone who is better versed in math than I am may want to look over these figures, but if your parent pets only have your desired gene once, there's only a 25% chance to get a baby with the double gene and then only a 2,5% to actually get a deviant out of that breeding!
 
Now, you finally managed to breed for a deviant, but how do you know what it will actually look like?
 
Well, ideally you can research the baby's genes. This means you either need to Research All in its genetics tab or have a Geneticist in your Inn so you can select to only research the colour/pattern genes. If you do this, you will see a yellow star next to the pattern or colour genes. This tells you where the mutation occured. Then you can go and look at the Skin Library, scroll down and check in the apporpriate table.  Let's take my Lilac Fantasy as an example again (of course we already know what she looks like since she's grown up, but let's assume we don't know that yet). We know that her deivation occured in the Colour genes and that her colour is Blue Roan *. So in the Skin Library we scroll down to the table that says Deviant Color, Normal Pattern and look at Blue Roan, and voila! We know what the baby will look like grown up:
 
 
If we don't have the option to research the genes, we need to see if we can deduce anything from the parents' genetics. Let's do a hypothetical case with a baby pet that looks like this:
It says on his profile that he is a Bay Skewbald*. Checking his parents, we see that his mother looks like this:
 and his father like this: 
 
Can you tell which Deviation our baby has? This one is actually really quite simple. We don't need to know anything at all about the genes here! Both the baby and the mother are Bay coloured. We don't know what their recessive colour genes are. The father however is Gray. Since Gray is the least powerful gene, it's impossible that there is anything hidden, so the father must have given our baby one of his gray genes, which means that the baby can't possibly have double Bay! Therefore, we can easily see that his double genes (his deviation) must be in the Pattern. Let's take a look at the Skin LIbrary again, scroll down to where it says Normal Color, Deviant Pattern and look for Bay Skewbald. This is what the baby will look like:
 
Okay, now for the last part: Double Deviants!
 
To get a double deviant colouring, one parent must have a deviation in Colour and one parent in Pattern. If you breed those together, you have a CHANCE to get a double deviant. However, remember how I said deviation is not inheritable? That means when you breed the parents, you still need a deviation to occur on colour AND a deviation on pattern. Both of those only have a 10% chance to happen so that BOTH happen at once, the chances are only 1%...  These are a rare treat!
 
For a while there was a bug that allowed you to breed any deviant colour with any deviant pattern pet but this has been fixed so now you actually need to breed fitting pets - it works exactly like normal deviant breeding just that you need to make sure that the baby will have double colour AND double pattern gene in the end.
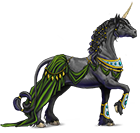
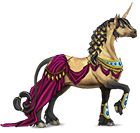
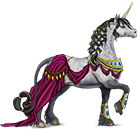
So in order to get for example this one:
you would have to breed these parents
x
always making sure that both of them have double Black AND double Cream genes. Once you bred the two, maybe start praying a little, since as I said, chances are 1% - that means 1 in 100 breedings! (Of course, if you know percentages, this means it's entirely possible to get a double deviant on your first breeding, it just means that it is VERY unlikely; similarily you aren't guaranteed a double deviant even if you do breed 100 pets together, the chance is still the same)
 

  • Timain
  • User
  • Posts: 723

Posted at 2014-07-29 11:34:50 — Link

Throdama and Morphs

A very special type of pet are the Throdama. They have the usual colours but they also have special Morphs - the Warrior, the Harvester, the Scout and the Defender. Each Morph comes in three different grades (depending on how many workers were assigned to the mother, while she was pregnant), giving them special extras.

Below you can see what each type of Throdama can do and which grades there are - if an ability name is listed, that means a Genetic ability, just as if the pet would have those genes. You can look the names up here, Also, higher morph grades automatically have all the abilities the lower grades had as well. (e.g. Grade 3 Warrior also has Grade 1 and 2 bonus)

Worker (that's the "normal" non-morph Throdama):
Artisan ability and they produce Pheromones
The only Throdamas that can breed

 Harvester: (Squad of Harvesters give you the Locust ability)
-- Negative Genes do not give you negative maneuvers on the battlefield.
Grade 1Resource find (Island) +30%,
Grade 2: Double Incisors,
Grade 3: Steel Muscle

 Scout:
-- You have Sneak Attack and an additional Move manuever on the battlefield
Grade 1: Silent Pace, Sense of Direction
Grade 2: Scout, Watchman
Grade 3: Gracefulness

 Defender:
-- Addition Defense maneuver
Grade 1: Steel Bones
Grade 2: Hitpoints increased by 25%
Grade 3:  Magic Mirror, Plates

 Warrior: (Squad of warriors gives the Stinking Cloud ability.)
-- Additional Attack maneuver
Grade 1: Sharp Claws, +10% Critical Strike
Grade 2: Poison Claws
Grade 3: Stench

 Note: When it says additonal X maneuver, it means you get that maneuver early, e.g you get the 2nd one without having the stat requirement

To see what morphs look like, check the List of Skins.

Now, how do you get one of these morphs?

First off, you need to prepare pheromones on one to three worker Throdama (that's the regular Throdama with no morph). If you simply want the look and don't care for the bonus the morph brings you, having one worker with the pheromone is enough. The higher grade morphs are much more powerful though, so if you want the morph for the bonus, you should try and get three workers with the pheromone. Also pay attention that the worker with the pheromones can't be the future mother!  

What you have to do to activate the pheromone differs depending on the type of morph you want. 

  • Defender morph needs your worker to LOSE 50 battles in the Arena
  • Warrior morph needs your worker to WIN 50 battles in the Arena;
  • Scout morph needs your worker to visit 20 islands and
  • Harvester morph needs your worker to gather 1000 resources on islands.

You can see a rundown on this and also how far you are in each section on your Throdama's profile on the right side, underneath the Actions and Effects boxes in a new box called Pheromones. It will look similar to this:

As you can see you can have as many or as few pheromones ready at the same time as you like.

Now then, once you have at least one worker with a ready pheromone, you can breed your female to a male, just like with any other pet.

Once your female is pregnant, you can start assigning pheromones to her. The box to select this is on the left side of her profile, underneath the Autobattle Settings. You have a dropdown menu to select which morph you want and then three dropdown menus underneath that, which show you your available Throdamas with the right pheromone. It looks like this:

Now you hit Save and you're basically done!

You now only have to wait for the baby to be born and when it grows up it will be your new Morph! Congratulations!

A few notes:

  • Morphs can't breed or produce pheromones. Only Workers can do that.
  • The pregnant female can't produce pheromones for herself. It needs to be other Throdama workers to care for her.
  • While the baby is not born yet, you can always change your brood-carers. Simply change them in the dropdown menu and hit Save. You can also choose not to create a morph after all by opening the dropdown menu, moving the slider all the way to the top and clicking on "Select one..."
  • While your Workers care for the mother and the baby, they are busy! You will not be able to use them for anything else!
  • Once the baby is born, the broodcarers will now take care of it. This means that until the baby is grown up, they will STILL be busy and unuseable.
  • Once the Worker is done with broodcaring, it will have lost this type of Pheromone! Each worker can produce pheromones for all four morphs, but only once each. This means I can use a worker for one Warrior, one Harvester, one Scout and one Defender morph, but after that it will never again be able to create any pheromones.
  • The pattern gene doesn't matter at all for a morph. The colour has impact on the look of your new morph, but no matter the pattern gene, all Field Warrior morphs will look the same. 

 Back to Top


  • Timain
  • User
  • Posts: 723

Posted at 2014-07-29 11:35:30 — Link

Genetic Power / Descendants of Heroes in x Generations

The FAQ already has a pretty big section for Genetic Power (often referred to as "GP"), but many people still find this confusing, so I will try to clarify it a bit.

You can see if a pet has Genetic Power when you check the pet's profile page. Also, when it's your own pet, you will notice that in the pet list, there are 1, 2 or 3 green stars under its name where it says "Heritage". That's how many grades of GP the pet has. If you don't see anything, don't fret. It just means your pet has no GP ;-) Oh, by the way, Degeneration is also shown there. You will see up to 3 red stars if the pet is inbred.

Now. What IS Genetic Power?

GP happens when 2 pets reach level 50 (the maximum level) and have children. Their offspring will have Genetic Power 1. Pets who have reached maximum level are considered Heroes. This is why their children are also called Descendant of Heroes. 

Now, when two pets who already have GP 1 reach level 50 and have babies, the offspring will automatically be GP 2. And the same goes for two GP 2 pets, who breed once they reach level 50. Their kids will be GP3. GP3 is the maximum, there is no GP4.

So far for the basics, but there are lots of special scenarios. 

If two pets with GP1 but NOT maximum level breed, their offspring will be GP1, just like the parents. So to advance to the next Genetic Power, you will need to level your pets up. 

Now, what happens when only one of the parents is level 50

This depends on the genes of the pets. There are 10 sets of genes, right? Well, if 7 or more of those sets have the dominant gene from the parent with level 50, the baby will have GP 1. This is the same when one parent has GP 1 and the other doesn't. Let's take a look at an example:

My pet Odyssey here has GP 1. By now he is also level 50, but ignore that for now. At the time the baby was born that I will show you, he wasn't 50 yet. Now, I bred Odyssey to Dream Weaver, who at the time was neither level 50, nor is she GP 1. Their baby is Dreamer. Take a look at Dreamer's genes. Remember that the right side of the Genetic chart is the father's side? Well, in Dreamer's case, only 5 of the Dominant genes are from the father, Odyssey. Since we need 7 or more from him in order for the baby to be GP 1, Dreamer only turned out to be a "regular old Unicorn" (1000s if you can tell me where I quote the regular old unicorn from ;)). 

A second example? My pet Sechalo turned 50. I bred him to Demeter, who (again) at the time wasn't 50 yet. Their baby? Hyperion. Check his genes! 8 genes are Dominant on the father's side and tadah!, I had my very first GP1 pet ;) His genes may not be the greatest, but he was my first bred GP1, so I still love him to pieces xD

So, you might start thinking about just breeding any of your pets to some GP3 stud so you can snag yourself your very own GP3, as long as the baby has 7 or more dominant genes from the other pet, yes? Well, think again. To prevent this (after all, getting GP3 should be an achvievement!), the above scenarios will not work if the parents are 2 or more grades of Genetic Power apart. This means if you breed your regular pet with no Genetic Power to a GP 2 or 3, the baby will NEVER get any GP at all. The only GP you can achieve in this case is for levels, with the usual rules. So if both parents are level 50, the baby will still be GP 1. If only one of the parents is 50, the 7+ dominant genes take effect again. Remember? The baby needs to have 7 or more genes from the level 50 parent to achieve GP 1. 

Scenario 1: Mother is noGP, not level 50, Father is GP 3, not level 50: The baby will not have any Genetic Power, just like the mother.

Scenario 2: Mother is noGP, level 50, Father is GP 3, level 50: The baby will be GP 1 because both parents are level 50.

Scenario 3: Mother is noGP, level 50, Father is GP 3, not level 50: The baby will be GP 1 if it gets 7 or more genes dominant from the mother, but noGP if it gets less than 7 dominant genes from mother side. 

Back to Top


  • Timain
  • User
  • Posts: 723

Posted at 2014-07-29 11:40:07 — Link

Catching Wild Pets

So to catch wild pets, first of all you need to click on the Pets tab in the menu, and from there on Capture Wild Pets. I invite you to read the already existing guide on that page. You can show this guide by clicking on the "How to catch pets?" link underneath the map. More information comes from the FAQ if you read the part about Catching Wild Pets (well.. Duh xD). The most important info is in there and you can probably figure most of the other stuff out yourself. 

I will still try to go through the whole process though, so if there is anything unclear, hopefully I can help you.

As I mentioned in the Buildings section in this guide, I highly recommend that you build a Cartographer's Guild before you attempt to catch your own pets. Failing that (it IS a very expensive building after all), you can also build the Inn and invite a Clairvoyant. This guest does the same thing as the Cartographer's Guild, meaning you will see where pets currently are on your map once you click on the magnifying glass in the top right corner. The problem with the Clairvoyant though, is that this guest will leave after 3 days in your Inn and you will lose your ability to watch pets' movements then too. So this is no real longterm solution. 

Now then, once you have the Guild (or the Clairvoyant), you will see something similar to this:

Before you start sending catchers out, the most important thing to remember is this: What you see up there is where the pets are at this moment. If you were to send catchers to those spots, they would not bring home any prey. You need to guess where the pets will be at the next update (every 4 hours real time, in the picture above it would be in 2 hours 1 minute) and place your catcher in that spot. 

As it says in the guide to capturing pets, there are Dens, Watering Points and Hunting Grounds:

  • Den - Heart of the Forest, Big Tree, Magic glade, Cave (requires Climbing Gear), Old Ruins (requires Climbing Gear), Island (requires Boat)
  • Watering Point - Waterfall, Creek
  • Hunting area - Eastern Fields, Western Fields, Big Field

Every pet will spawn at a Den. The Heart of the Forest, Big Tree and Magic Glade are where (any) ground-dwelling pets will spawn, Cave, Old Ruins and Island will spawn (any) flying pets. Now the distintiction between the two isn't ALL intuitive.

  • Ground-dwellers are Pumas, Unicorns and Cockatrice
  • Flyers include Rocs, Dragons and Gryphons. 

As you see, even though Cockatrice have wings they are NOT considered a flying species. 

Now, which pet spawns at which Den is random (except for the flying / ground distinction), but once a pet inhabits a Den, it will always return to that one, e.g. if a Puma spawns at the Magic Glace, it will never show up at the Big Tree. 

So, to make this a bit easier, we will follow one pet through its life cycle on your map. We shall choose that Puma who is in the Heart of the Forest up in the picture and we shall call him Max. 

  1. So Max is all grown-up and decides to go out into the world. He is thirsty and decides to go to one of the watering holes. His options are the Waterfall or the Creek. He chooses the Creek, but when he gets there, a Cocaktrice is just arriving too. The two of them fight and although he tries his best, Max loses and has to return to his Den to lick his wounds. (for us, this would show up as if Max had never left the Heart of the Forest. At the next update he will still be sitting in there).
  2. Well, Max is still thirsty, so he decides to chance it once more. His choices are the same as before. Let's say this time he picks the Waterfall. When he gets there, a Unicorn is also there, but because the Waterfall is such a big area, two pets have room, there's no need to fight over it. Both Max and the Unicorn can drink there at the same time. (we would see both Puma and Unicorn at the Waterfall next to each other - see the bigger yellow area in the bottom corner on the picture above? In the picture there's only a Uni in there, but it shows you that in theory a second pet would fit there)
  3. All right, now that Max' thirst is quenched, he decides that it's time to eat something. His choices are the Big Field, the Eastern Fields and the Western Fields. Let's say he chooses the Big Field. This is again an area where two pets can fit together, but this time he doesn't meet anyone there and can hunt to his heart's content. (we would see him alone in the big yellow area)
  4. Now that Max is neither hungry, nor thirsty, he will return to his Den. So at the next update we will find him back at the Heart of the Forest. 
  5. After a little nap, Max is thirsty again, so he again has to decide between the Waterfall and the Creek and.... Yeah, I hope you see where this is going ;)

If you have some time, you can follow each of the pets on your map around like this. They will always follow the same routine once they have one (although which watering hole or hunting ground they choose is still random), but each pet is different, so you can't assume that they will go to drink first and eat later, some do it the other way around. 

Once we know all this, it's rather easy to successfully catch pets. You need to know the cycle of your pets. So what I do, I check the map, note where each pet is, then wait for the next update, compare where the pets are and try to assume what happened and where they will go next. Let's say I want to catch Max. After the first update, I still don't know anything, because he's still sitting at the Heart of the Forest. So I wait another update. I see that he is at the Waterfall now. This tells me that his cycle is Den -> Watering Hole -> Hunting Ground -> Den. I can assume that next update he will be at one of the Fields, so I will place a Mammal Catcher at all three points. In our example one of my catchers would indeed find him at the Big Field. 

If a catcher is going to be successful, is hard to say in advance. The base capture chance goes by thet pet's stats. An absolutely average pet would have a base capture chance of 35% (see FAQ for this), higher stats would make it harder for your catcher. Also, catching pets at the watering holes is always 20% easier, at their Dens it's 20% harder. Finally, the months make a difference. Month of Beast for example makes it 20% harder to catch Pumas and Unicorns, month of the Catcher however makes it 20% easier. Month of the Bird would have no influence on our chances, since it only affects how hard Rocs and Gryphons will be catchable. 

I'm not going to list which month does what because there is a comprehensible list of this in the How to catch pets? section under your map. There is also a list there that shows you which pets are Birds, Mammals and Reptiles. Whenever you get unsure, just open it up and take a look. 

I will now cover a few questions that pop up every now and then:

What is the Magic Catcher?
This is a guy who can capture any and all pets. If you guess that both a Unicorn as well as a Roc will end up at a spot, you can send a Magic Catcher to be prepared. The Magic Catcher does not have any higher catch rates than the other catchers, his only advantage is that he isn't restricted to catching only one type of pet. To get the Magic Catcher, all you need to do is have a Magic Bomb in your inventory (you can find this item by exploring or you can buy it in the Premium Store or buy it from other players in the trades). No need to do anything with it, as soon as you have it in your warehouse, the Magic Catcher will be at your service and show up in the list on the right side of the map. The other option is to hire him directly from the catcher list next to your map. This will cost 5 gold coins. Oh yes, if your Magic Catcher doesn't catch anything, you will not lose the Magic Bomb / the catcher. The bomb will however be used up if he captures a pet, he will vanish from the list at that point. 

Why can't I send catchers out?
Most often this is caused because you have no room in your stables. Always remember that pregnant pets count for two pets (because your baby will need a spot too once it's born). The game assumes that every catcher you send out will bring a pet home. This means that to send 3 catchers, you will need 3 spots in your stable. 
The other most common reason is that you didn't buy enough Licenses. For each catcher, you need a license from the State Store

How do I get a specific creature to spawn?
Let's say you have lots of other creatures on your map, but you want a Unicorn. You catch whatever you can, but respawns are always something else. Where are those elusive Unis??

Well, one thing to do is to only capture pets from Dens that correspond to the creature you want. As I mentioned above, there are Flying and Ground Creatures and they will only ever spawn in their respective Flying and Ground Dens. The game checks for empty dens every update and when the Den has been empty long enough (I believe it's 4 cycles, so 16 hours), a random creature fitting to that Den will spawn. This means that you will NEVER get a Unicorn to spawn if you capture Dragons, Gryphons and Rocs. You need to free up a ground den and only then do you have a chance that the next inhabitant will be a Unicorn. 

On that note, you can make the pet respawns faster if you invite a Dryad into your Inn. She will fill empty Dens at the next update cycle and you will not have to wait as long. Another option is to invite a  [Creature ] Magician (e.g. Gryphon Magician, Claw Magician (this is for Pumas), Cockatrice Magician and so on). These will increase the likelihood that "their" creature spawns in Dens. It still needs to be a fitting Den though! If you don't have empty ground dens, a Cockatrice Magician still can't do anything for you - he will not be able to spawn a Cockatrice in a Flying Den!

Back to Top


  • Timain
  • User
  • Posts: 723

Posted at 2014-07-29 16:02:52 — Link

What are Kami? / Are there Special Looks that Pets can't get anymore?

  • The first special pets to appear were the Kami of the Apocalypse with this event  that was going on between January and February 2014. They were quite difficult to get, for each you had to do different tasks, like sacrifice 20 pets, hold a certain point for 10 hours on the battlemap, do a quest with a specific pet each day to obtain and hand in a special resource, sacrifice food items and vermillion etc. They were only available during the time the event was going. (I also added a link to my own Kami so you can check out their genetics / stats in case you're interested):

 DeathFaminePestilenceWar

  • Next came the Kami from the Dreamlands. The event went on in November 2014 and as with the Kami of the Apocalypse, you had to complete certain objectives in order to convince them to stay with you. This is what they look like:


Sadly I wasn't very active during this event, so I didn't get any of these Kami to join me. If you have one of these pretties, I'd appreciate if you let me have the link to them, so the pictures link to a real Kami for stats/genes.

  • In February 2015, the next event brought us a new Kami, Amor:


  • April 2015 had us collect Easter Eggs from islands. The beastlords who found the most eggs were awared a Hopper. There are four different colours for Hoppers.

  • In September 2015 a new Kami joined our ranks. Carpo also had to be pursuaded to join the stables, like all other Kami before her. Carpo is a special little Kami, because while she is in your stable, your pets will find 20 % more food from islands! 

Carpo

  • In November 2015 we had an event, where we needed to collect Pumpkins. Hell Pumpkins came from exploring islands and Doom Pumpkins came from multiple sources, like doing gold quests, crafting or extracting them from Dragons with Fearsome Look or Cockatrices with Petrifying Gaze.

With those pumpkins, we could buy a Hell Drake and a Doom Drake Kami. They are special in that you get an additional 30 (!) stable slots when both are with you.
Doom DrakeHell Drake

  • The (as of now) last Kami event was held in February 2016. We had to convince Dita, Amor's sweetheart, to join our stables! Aww, aren't they cute together?
    Dita

A few notes about Kami:

  1. Since they were only available during the time of their respective event, you will not be able to get one of these if you didn't participate, unless you trade for them from another player. However, given how rare they are, it's probably quite unlikely that you will get someone to trade you theirs. 
  2. Kami cannot breed. 
  3. You can't change a Kami's look with a Rainbow Jar.
  4. You CAN change a Kami's gender with a Change Sex scroll, but pay attention that you still won't be able to breed them, no matter if they're male or female.
  5. Hoppers are somewhat special since they come in four different colours and you got them at level 1 instead of 50 like the other Kami - this led to some speculation that they might become breedable at one point. So far nothing has happened in that regard, but who knows!

---------------------

Another event that brought us special looks, was the Spring Festival, which went on in March 2014, where we could obtain special Festive Outfits that worked like Rainbow Jars and could change the appearance of our pets. This festive outfit also had the added bonus of giving the pets 5 more maximum Energy. They were available for Dragons and Unicorns as crafted items (the blueprint and the special ingredients vanished after the event ended) as well as for Symurghs as an item bought in the Premium Store. The outfit would change the pet's appearance depending on its base colour. This is what they looked like:

Snow WhiteTrue SpiritRockstarSilent NightRumor Has ItLittle RumorShaefferNymiraBrannenDark FireFiannaKaneOwinRoycRaythSaheenaDonavanSumiiro

Back to Top


  • Timain
  • User
  • Posts: 723

Posted at 2014-07-31 09:23:41 — Link

Interesting Links

FAQ
Genetic Library
List of Skins
List of Recipes (Building Costs)
Help Forums
Contests and Giveaways Forum
Guide: Making Money
Guide: Inn Guests
What to feed?

 [More to be added]

Special Thanks

I just want to throw a big Thank You out there to everyone who suggested an addtition or change to the guide! A special thanks however goes to Azure, for rereading this guide I don't know how many times and giving me tons of suggestions for improvements! This would have been nowhere near as understandable without your help! :)

Also a big thank you to Wireath, who pointed out that Carpo is rather special and who was kind enoug to let me use their Throdama skills writeup. Thanks! 

Version History

End July / Beginning August 2014: Creation of the guide
7 November 2015: reworked Double Deviant and Kami sections and added a chapter on Throdama morphs
15 November 2015: reworked Genetics part, added pictures and a few tables in hopes of making things clearer; added a Back to Top navigation button to each post

 Back to Top


  • TGA
  • User
  • Posts: 4

Posted at 2015-04-09 06:09:10 — Link

This guide was very helpful, thank you for making it!


  • SiberianWhite
  • User
  • Posts: 464

Posted at 2015-07-25 00:51:44 — Link

This guide was super helpful. Thanks for making it!

방탄소년단 ::起承转结


  • vetra
  • User
  • Posts: 12

Posted at 2015-07-29 15:17:25 — Link

This really helped me, thanks!


  • kittensrule321
  • User
  • Posts: 793

Posted at 2015-08-24 21:46:33 — Link

Timain, you are amazing!

All you have to do is update the kami. There are now hoppers and amor.


  • UtterlyWeird
  • User
  • Posts: 8

Posted at 2015-08-30 22:16:07 — Link

Very indepth.  I just wish I was able to learn this kind of stuff by reading it.  *scratches head*


  • night4kuma
  • User
  • Posts: 2

Posted at 2015-09-20 15:37:05 — Link

Thank you so much for posting this guide! It is very helpfull, definetly have a better unnderstanding now! :)


« Prev | 1 2 3 | Next »

Xsolla is an authorized global distributor of BeastKeeper
Xsolla