Coloring tutorial: creating a Reticulated Giraffe Unicorn
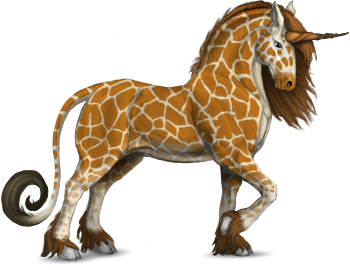
Players often ask how to work with single-layer pet bases. I find it significantly more convenient to recolor a single layer instead of 4 different layers (base, higlights, shadows and lineart). I'm using Adobe Photoshop (any version starting from CS will do) and Wacom Bamboo tablet.
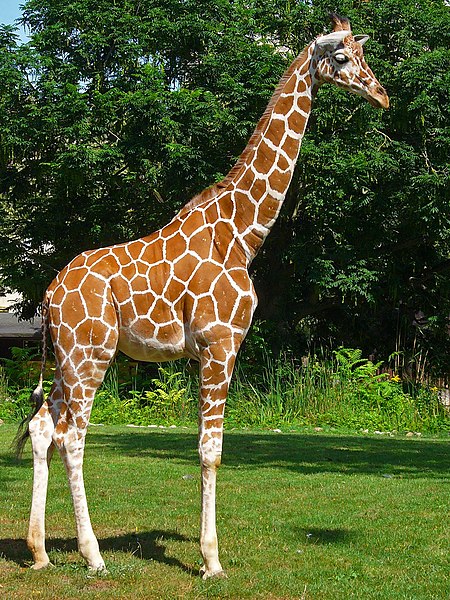
1. First of all, I'm opening a PNG base and deciding what skin do I want to create. Since this is a coloring tutorial, my inspiration will be a natural and simple but yet spectacular reticulated giraffe from Wikimedia Commons:
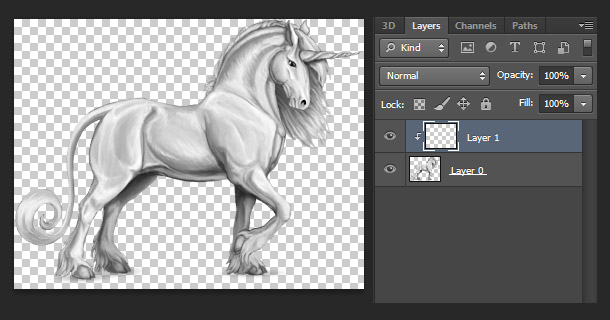
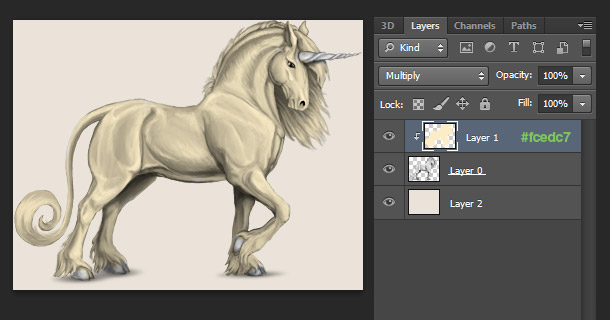
2. I create a new layer (Shift+Ctrl+N) and setting the base layer as a mask by clicking Alt between 2 layers in the Layers palette. From now on, I will do this with every new layer which I create so my coloring won't come out from the base.
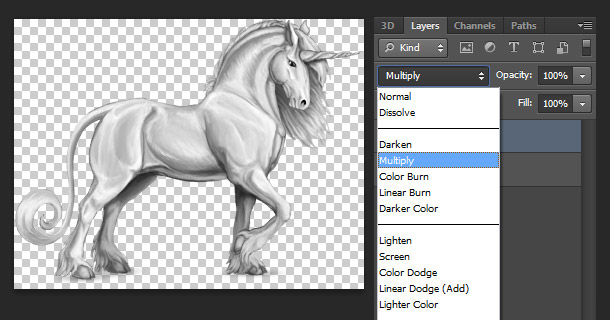
3. Now I'm setting the new layer to Multiply blending mode. This means that the colors of this layer will be multiplied by the colors on the layer(s) below, so the resulting color will be always darker. It's very handy to put the color toning in this mode.
4. I'm toning all the haired parts into the pale yellow color. Also note that I've added a pale color to the background layer: this helps to percieve the colors right.
5. Now the most interesting (and the dullest at the same time) stage begins: I will add the pattern. I create one more layer for skin pattern and setting it to Multiply too. And this is the moment when our giraffe the reference will become indispensable. I'm taking the color from the spot on the giraffe's shoulder and begin to draw pattern.
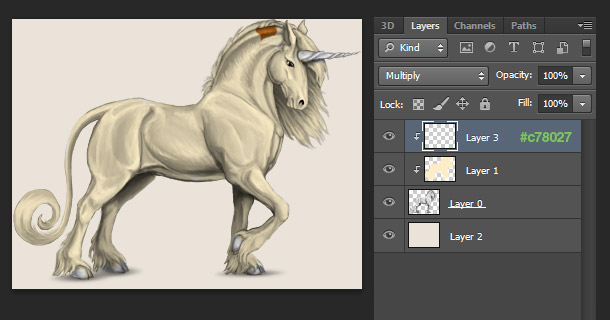
6. I'm hitting Ctrl-+ to zoom and continue I'm working on the pattern. Our image is quite small and it will be hard to draw the lines carefully without zooming.
I do not copy the form and placement of the spots from the reference but try to understand the rule how the pattern is formed. My unicorn isn't a giraffe - he has many anatomical differences which I need to take into account to make the pattern look natural.
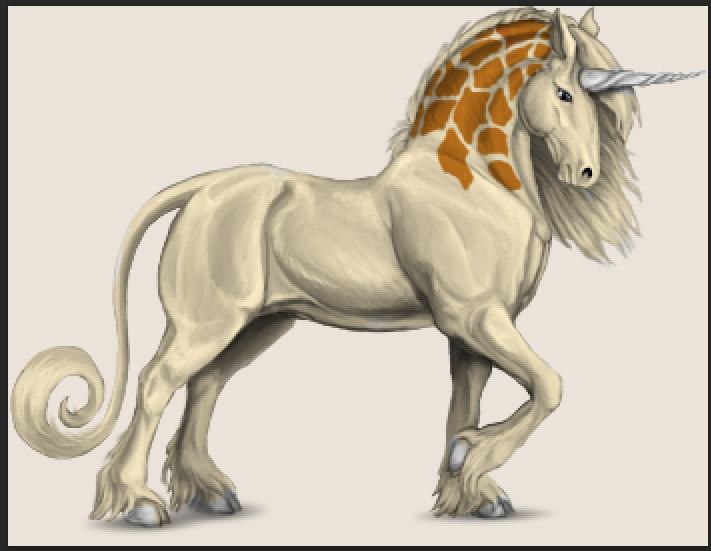
7. The pattern is finished. Note that the shape of the spots is distorted by the muscles and the form of the limbs: this helps to make the pattern look natural too.
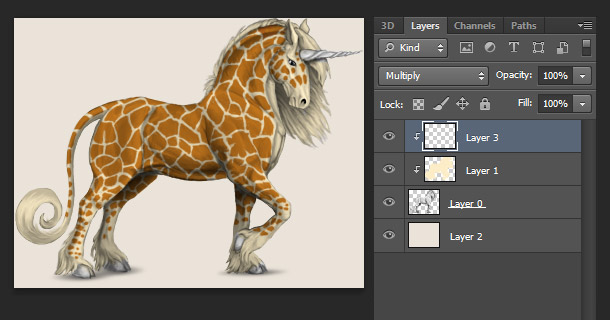
8. One more layer in Multiply mode to add the colors to the mane, tail, feathers and muzzle. I'm using dark orange/brown and dark grey colors. Never use the pure black! You will lose all the details and end with a pitch-black flat blob.
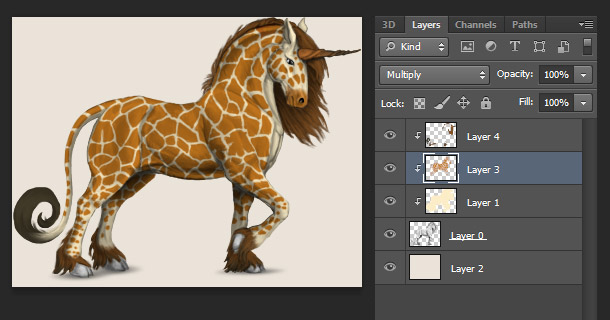
9. Now I'm adding a layer mask to layers with the base toning and the pattern. Taking a soft round brush with opacity set to ~20%, I'm painting with black color on the belly, bottom parts of legs and head to reduce the opacity of spots and make the base yellow color almost white in these areas.
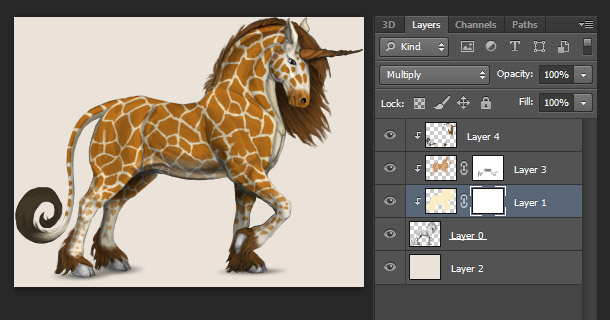
10. I want to add some small highlights. One more new layer, but now it's set to Overlay blending mode. I'm taking a soft round brush with opacity ~10% and setting the color to white, and adding higlights on horn, tail, mane and feathers.
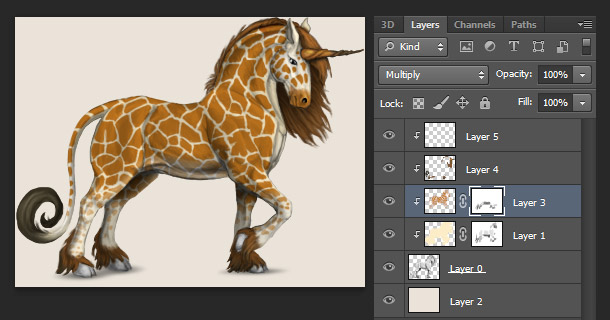
11. Done! Now I need only to turn off the background layer and save the skin as PNG.
Thanks for reading :)

